GeekSeller does not specialize in taxes. This guide explains how to set up taxes in a WooCommerce account, but you should always check it with tax specialist if you are unsure what tax values you should use. It depends on many different factors such as your country, state, category of a product, etc.
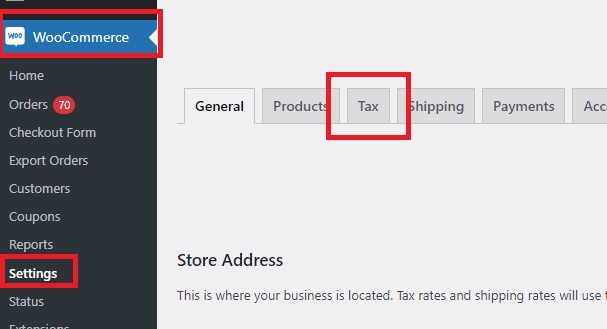
Log in to your WooCommerce store and navigate to WooCommerce → Settings → Tax.

If you do not see the Tax tab in the Settings section, please navigate to the General tab and enable Taxes (make sure to hit the Save Changes button after ticking it).

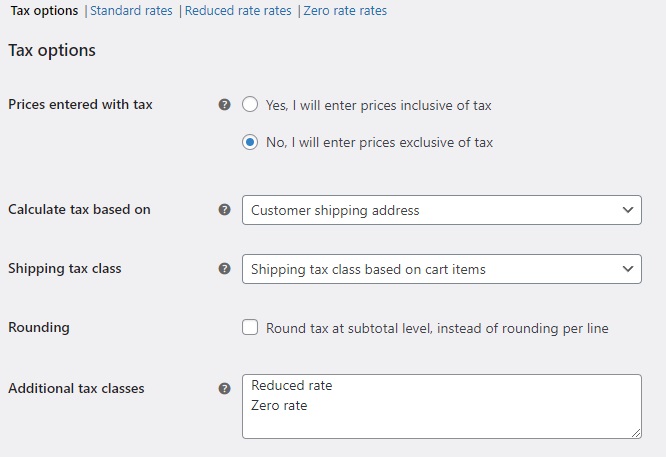
First, select whether your products’ prices include tax or not:
– “Yes, I will enter prices inclusive of tax” – prices of your products include tax
– “No, I will enter prices exclusive of tax” – prices of your products do not include tax

“Calculate tax based on” determines whether tax is based on “Customer shipping address”, “Customer billing address”, or “Shop base address”.
“Shipping tax class” can be left as “Shipping tax class based on cart items” for more stores. This means tax is based on the items in the cart.
If your tax class requires rounding as done last, please tick “Round tax at subtotal level, instead of rounding per line”.
“Additional tax classes” are additional classes that you can use outside of the default standard rates.

Each added tax class is available at the top of the edit interface. You can adjust each of them by clicking on the tax class you wish to adjust.

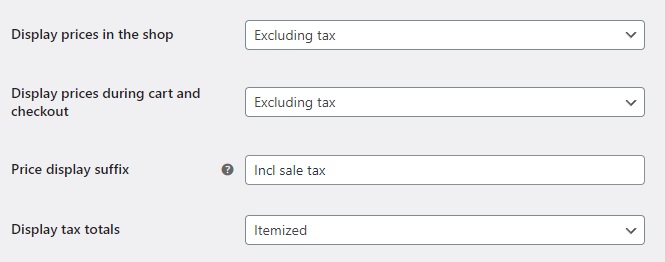
“Display prices in the shop” and “Display prices during cart and checkout” determines whether the prices of your products will show tax or not. Please select the desired option.
“Price display suffix” lets you add a suffix to the prices of your products displayed in your store. In our example, we added “Incl sale tax”. This is how it looks like in the store.

Lastly, you can decide whether the tax total will be displayed as one value for all items in the cart or for each item separately (select Itemized for each item separately and As a single total for one value for all items in the cart).

