WooCommerce offers a tool to manage Menus, so you don’t need any plugins to adjust them. Please remember that there are plugins to modify this part of your WooCommerce store, but this guide explains how to do it without any additional tools.
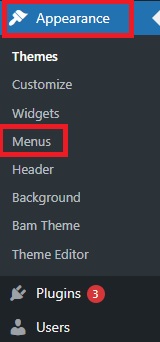
Log in to your WooCommerce account and navigate to Appearance → Menus.
The next step is to hit the “create a new menu” button. It will open a new window.
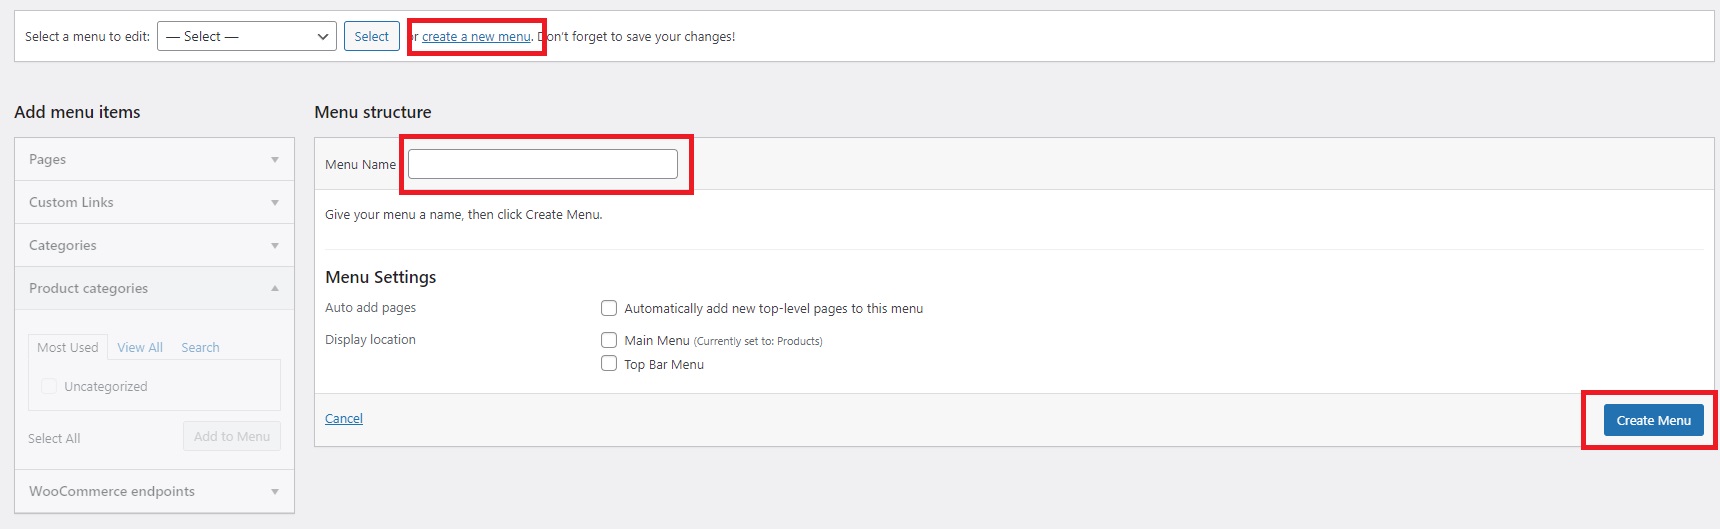
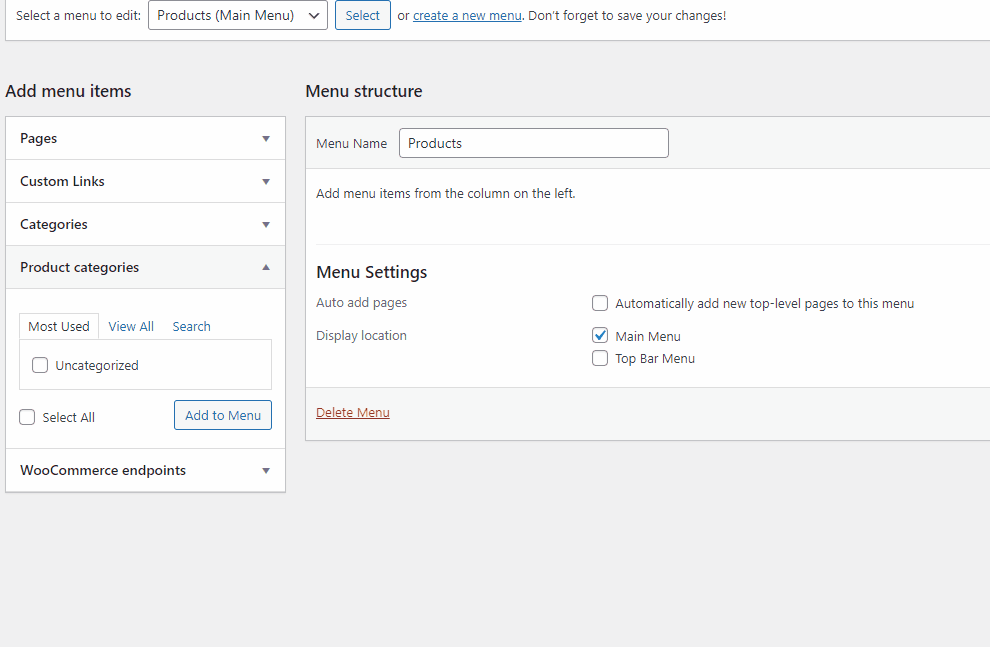
Add “Menu Name” and hit the “Create Menu” button. What you need to do next is to add items to the new menu you just created. You can do it with the “Add menu items” section.
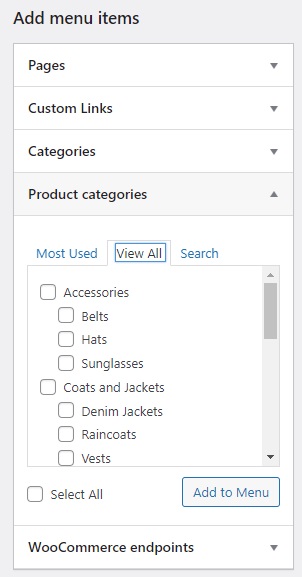
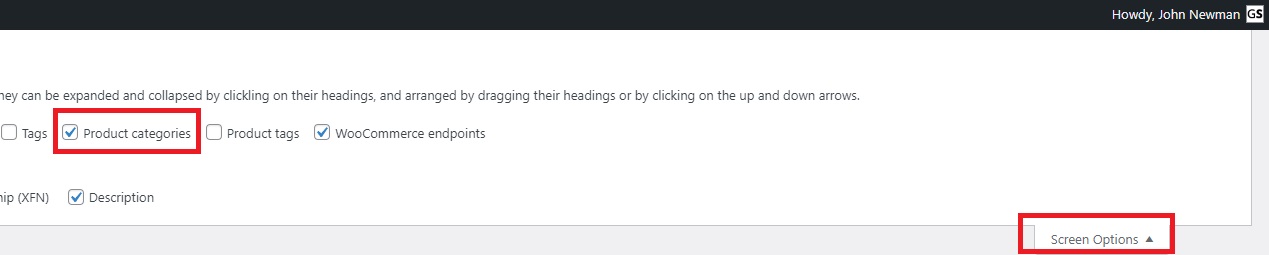
If you do not see the “Product categories” section, please ensure it’s enabled in the “Screen Options” section of your WooCommerce account. You can find this section at the top part of the page.
Now it’s time to add product categories to the menu. You can add all product categories at once or add just selected ones. In our example, we added all available product categories to the menu.
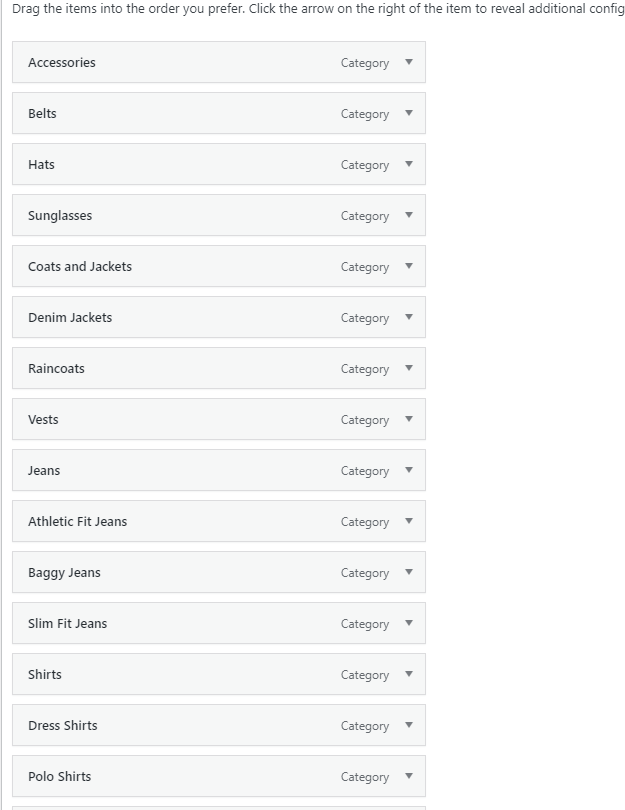
After you add all desired categories, you can change the order of categories and create subcategories.
After all the changes, please always make sure to hit the “Save Menu” button, or you will lose all your adjustments.
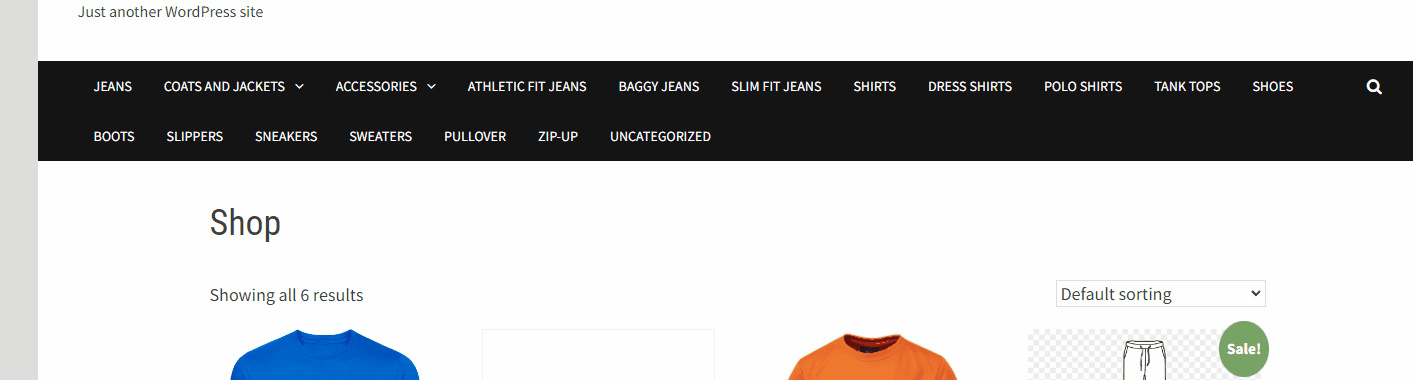
We can now review our adjustments on the shop website.