To add a shipping method in your WooCommerce store, you should start by adding Shipping Zones via WooCommerce → Settings → Shipping → Add shipping zone.
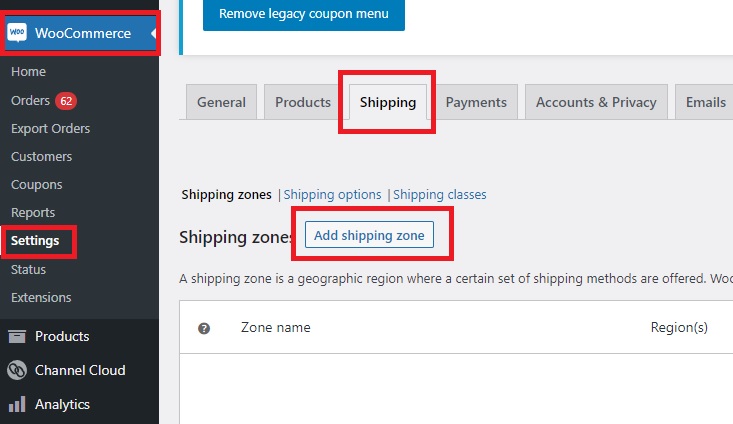
It will open the Shipping Zone creator:
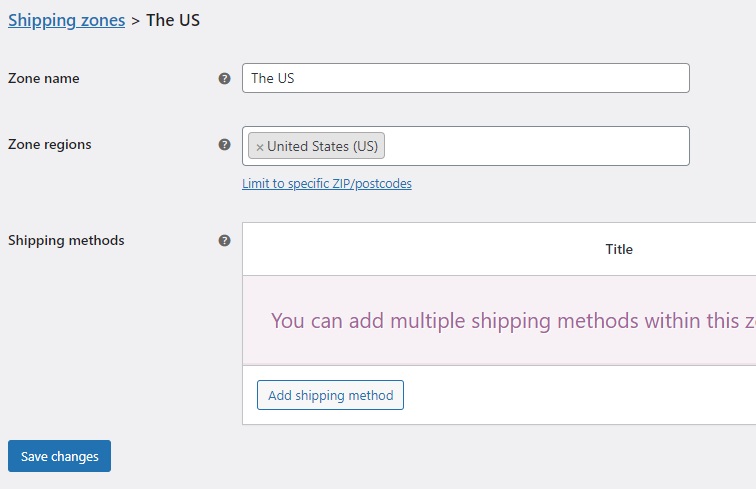
Zone name – This is the name of the zone for your reference.
Zone regions – These are regions inside this zone. Customers will be matched against these regions.
You can also limit the zone to specific ZIP or postcodes. Simply hit the button and add the codes to the list.
Now it’s time to add shipping methods available for this specific shipping zone. Click “Add shipping method,” and a new window will pop out.
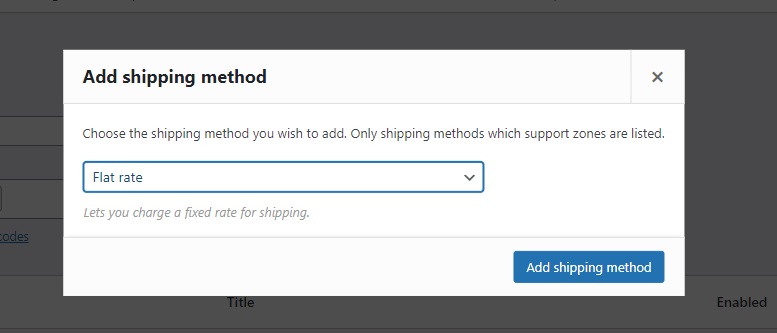
There are three available options:
Flat rate – This lets you charge a fixed rate for shipping.
Free shipping – Free shipping is a special method that can be triggered with coupons and minimum spends.
Local pickup – Allow customers to pick up orders themselves. By default, when using local pickup store base taxes will apply regardless of customer address.
You can add all three methods to a shipping zone. After adding selected shipping methods, make sure to hit the “Save changes” button:
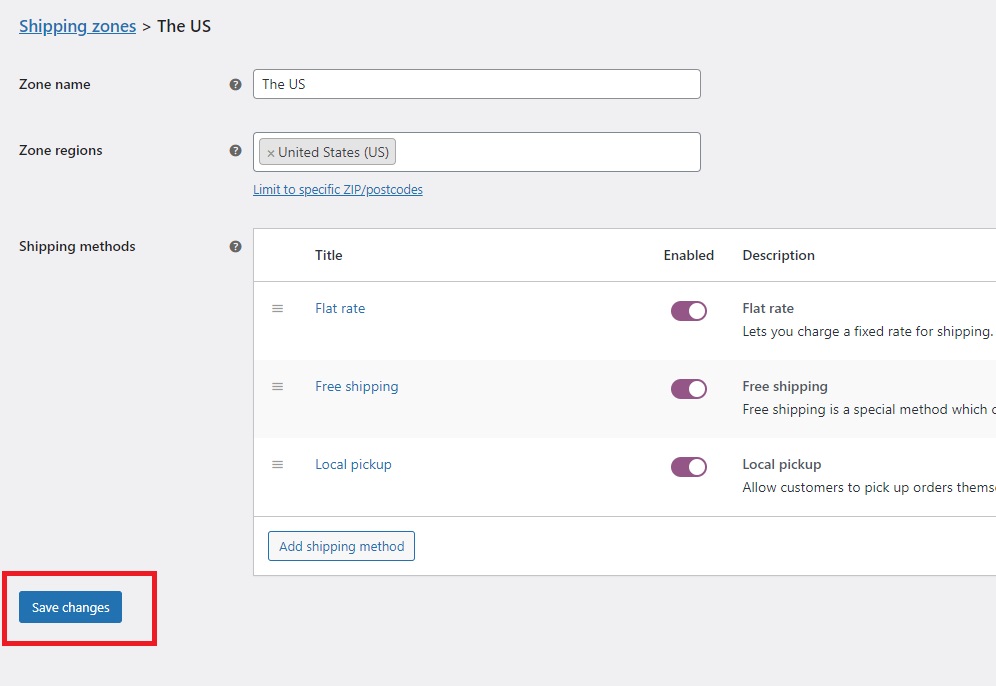
Each shipping method is editable. Mouse over shipping method title, and you should see the “Edit” button.
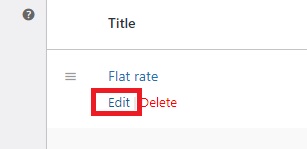
Each shipping method has its own set of values that can be modified.

Flat Rate Settings
Method title – The name of shipping method shown to customers during checkout.
Tax status – Either “Taxable” or “None”.
Cost – Enter a cost (excl. tax) or sum, e.g. 10.00 * [qty].
Use [qty] for the number of items, [cost] for the total cost of items, and [fee percent=”10″ min_fee=”20″ max_fee=””] for percentage based fees.

Free Shipping Settings
Title – This controls the title which the user sees during checkout.
Free shipping requires… – You can specify when free shipping is applied to an order.

Local Pickup Settings
Title – The name of shipping method shown to customers during checkout.
Tax status – Either “Taxable” or “None”.
Cost – Optional cost for local pickup.
