This guide explains how to add tracking number to order. In this example we used the “Shipment Tracking” plugin. Before proceeding with the guide, please install this plugin in your WooCommerce account.
To add a tracking number to a WooCommerce order, please log in to your WooCommerce account and follow the steps below:
1. Navigate to the Orders section and select the order you want to add a tracking number to.
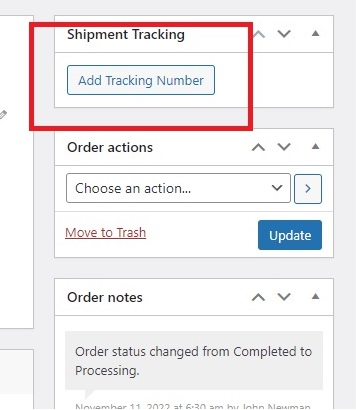
2. The “Add Tracking Number” button can be found on the right-hand side of the page.
3. Enter the tracking number, provider name, and date shipped. If you select “Custom Provider”, it’s highly recommended to provide a tracking URL. Other carriers will automatically generate the URL, which is why you won’t see this field if you select a non-custom provider.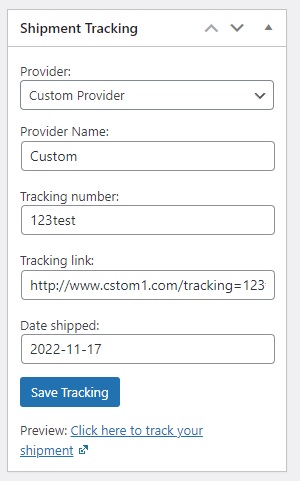
4. Hit “Save Tracking” and then change the status of an order to “Completed” and make sure to save the changes (“Update” button).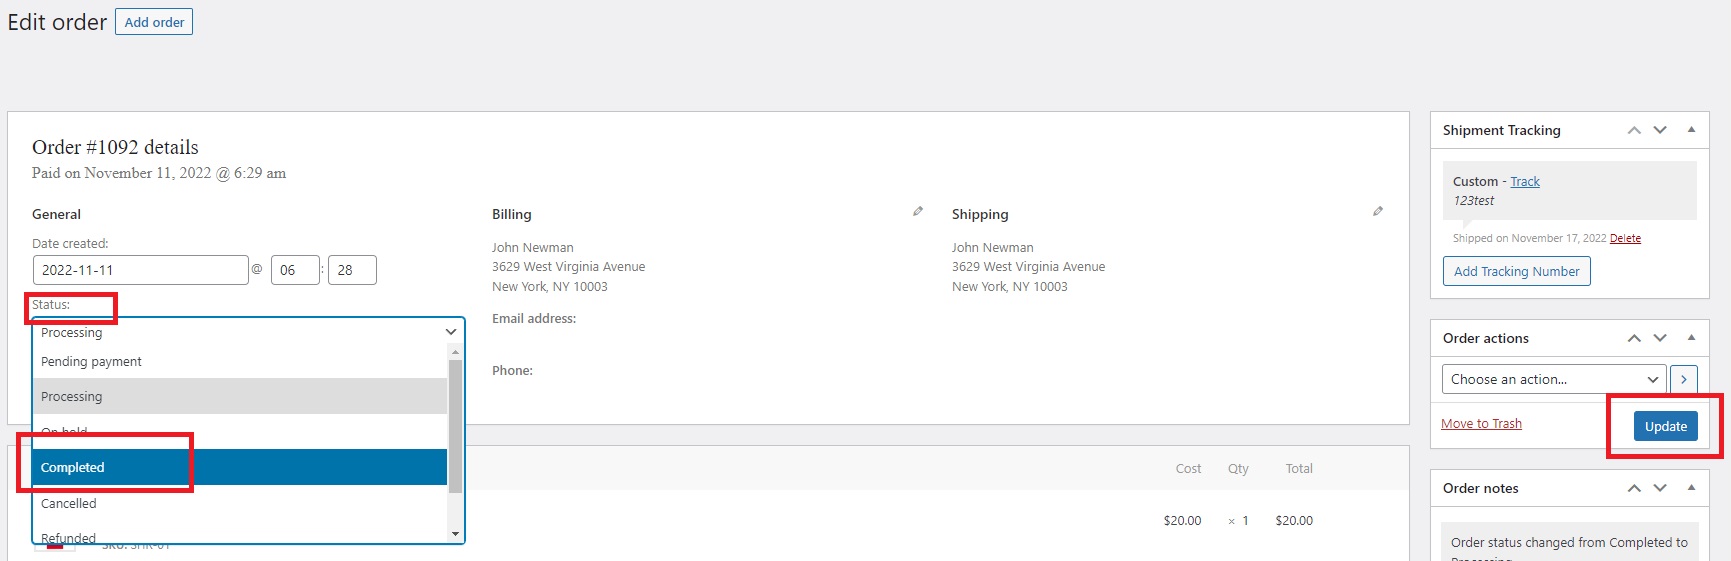
5. Your tracking number will now appear on the order page, and your customer will receive an email notification with tracking information.