This guide explains how to add products to your WooCommerce store and how to add variations and attributes. Installing additional plugins in your WooCommerce store is not required.
To add a new product to your store, log in to your WooCommerce account and navigate to Products → Add New.

The first two sections you are about to fill out are Product Name and Long Description.
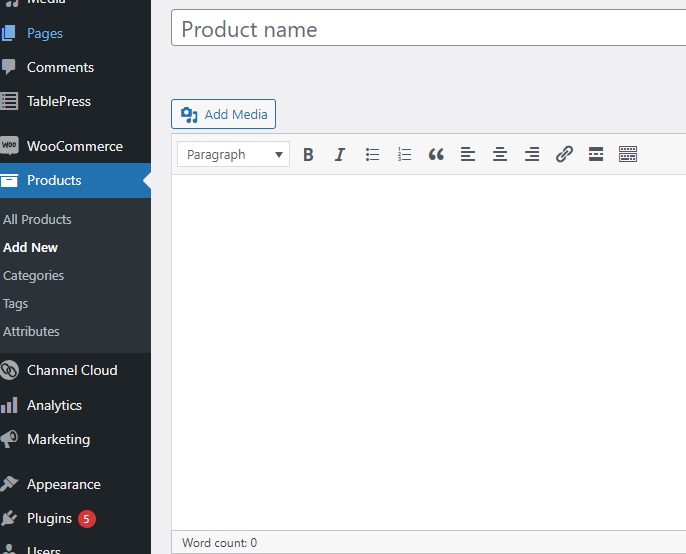
You want to insert product name into the Product name field and description or content data in the larger text field below. There’s no character/word limit for the description field. You might want to use a bulleted list for better readability. What you write up here will appear in the description section of a typical product page layout.
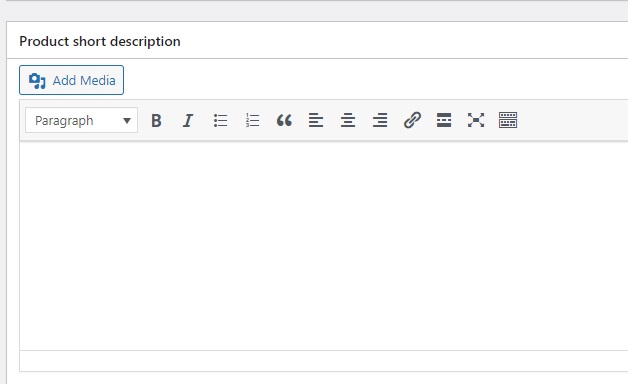
To add text beneath product name, you want to use the Short Description field instead. You should keep this description short, just as its name suggests.
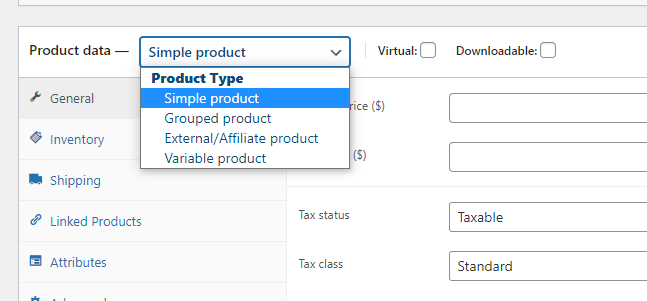
The next step is to select what type of product you are adding to your WooCommerce store. There are four product types plus two modifiers:
1. Simple product – a default type of product. In general, you want to use this type of product for all products that do not fall into one of the three remaining types listed below.
2. Grouped product – used for creating bundles or sets. You want to use this product type to create bundles, sets, etc. that consist of Simple products.
3. External/Affiliate product – use this type of product if you want your WooCommerce store to link the “Add to Cart” button to an external page.
4. Variable product – a type of product that is offered in different colors, sizes, etc. This guide will show how to add attributes and variations to your WooCommerce products later. You can also use this link to scroll down to the attributes/variations section.
There are two modifiers available for each of the product types mentioned above:
1. Virtual – you should tick this modifier for digital products that don’t require shipping
2. Downloadable – select this modifier if there’s a downloadable file attachment available for the offered product
After your select the type of product, now it’s time to fill out all the remaining data.
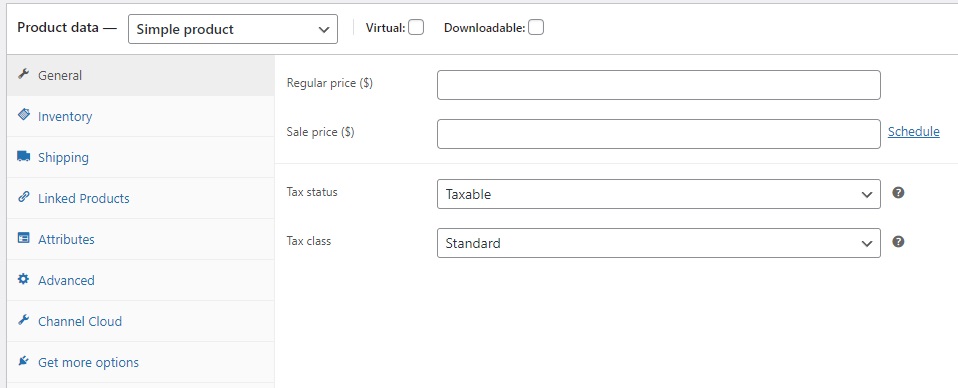
Under the General tab, you want to specify Regular price, Tax status, and Tax class. The Sale price field is not required. It’s used when you wish to set up a promotion for the product. Please keep in mind Sale price should always be lower than the Regular price. If you do not want to offer a discount now, leave the Sale price field empty.
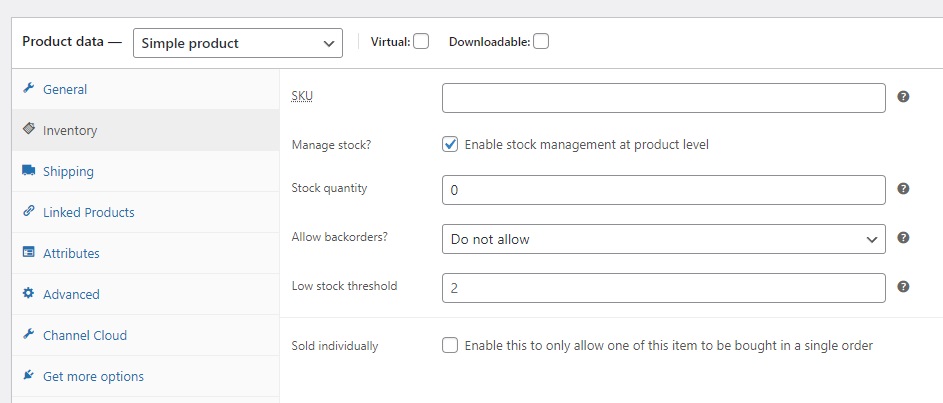
Under the Inventory tab, you want to specify the product’s SKU and adjust stock management settings for this item. WooCommerce does not require SKU, you do not have to provide it, but if you want to automatically synchronize quantity between your WooCommerce store and other systems, you should provide it. You should also make sure the SKU of this product matches the SKU of the same product in another system or marketplace. It will prevent issues with quantity data synchronization in the future.
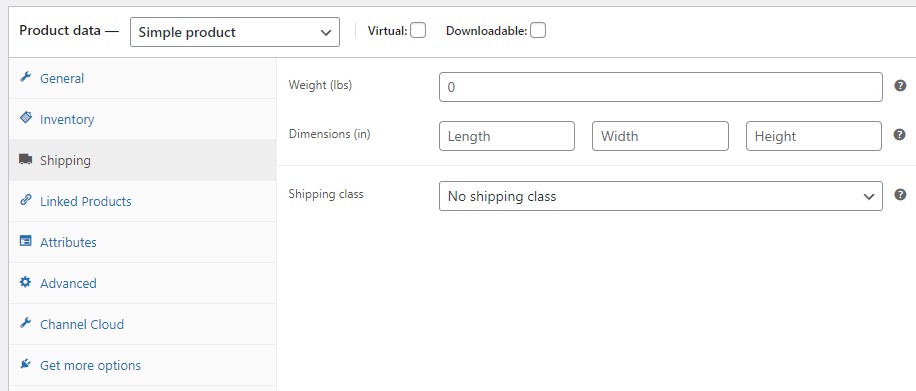
The Shipping tab lets you specify the dimensions of the product and assign it to a Shipping class. The Shipping class list will be empty until you create at least one Shipping class in your WooCommerce store.
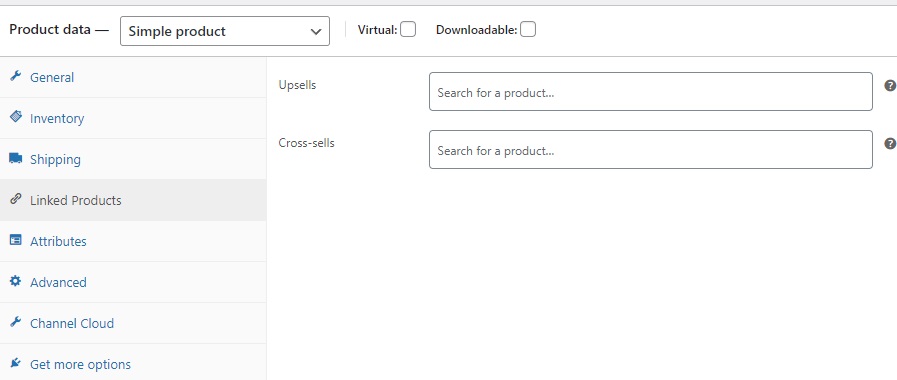
The Linked products section lets you link a product with other items. Upsells are products you recommend instead of the currently viewed product, for example, products that are more profitable, better quality, or more expensive.
Cross-sells are products you promote in the cart based on the current product.
We will discuss the Attributes section later in this guide. Use this link to scroll down to this guide’s attributes/variations section.
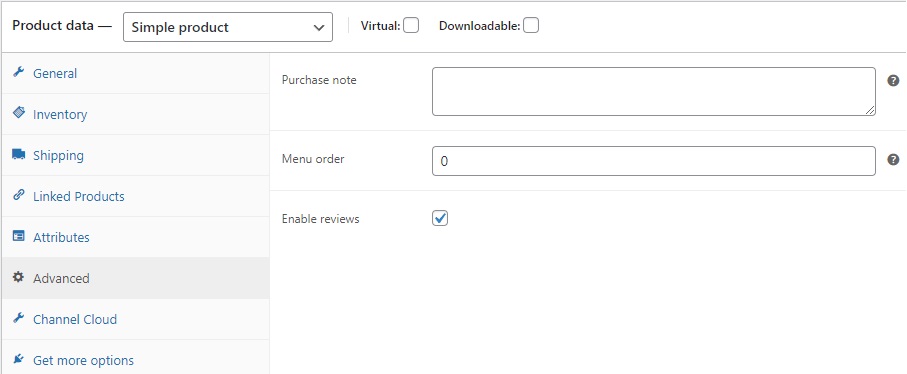
You can add a Purchase note to the product in the Advanced section. This note appears after the buyer places an order. You can also select the custom ordering position for the item and check the box to enable customer reviews.
A few last steps to push your product live are:
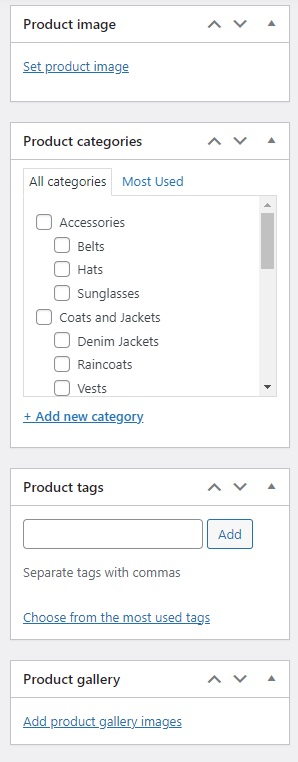
– Set up the main image of the product
– Specify the category of your product (please keep in mind you must first add product categories to your WooCommerce store, you can check this guide on how to do it)
– Add alternate images of the product
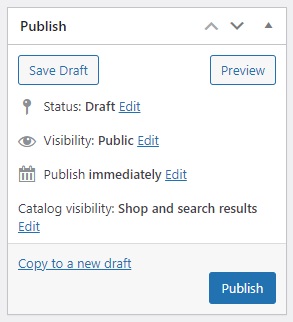
Once you provide all the data, just hit Publish button, and it will add this product to your WooCommerce store. You can also Preview it or save it as a Draft and finish it later.
Attributes and Variations
Let’s start by explaining the differences between Attributes and Variations in WooCommerce:
Attributes – these describe your product and are not used as variation attributes. It means buyers can review this data, but they can’t select different variants from a drop-down menu as it is with Variations.
Variations – these also describe the product but serve as a variant attribute for buyers. It means buyers can select different variants (i.e., different colors or sizes) from a drop-down menu, which will let them add those different products to the cart.
Please remember that you can only set up variations if you add attributes in your WooCommerce store. This is how you can create product variations in WooCommerce:
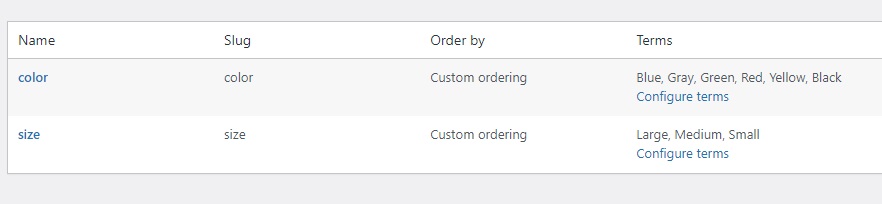
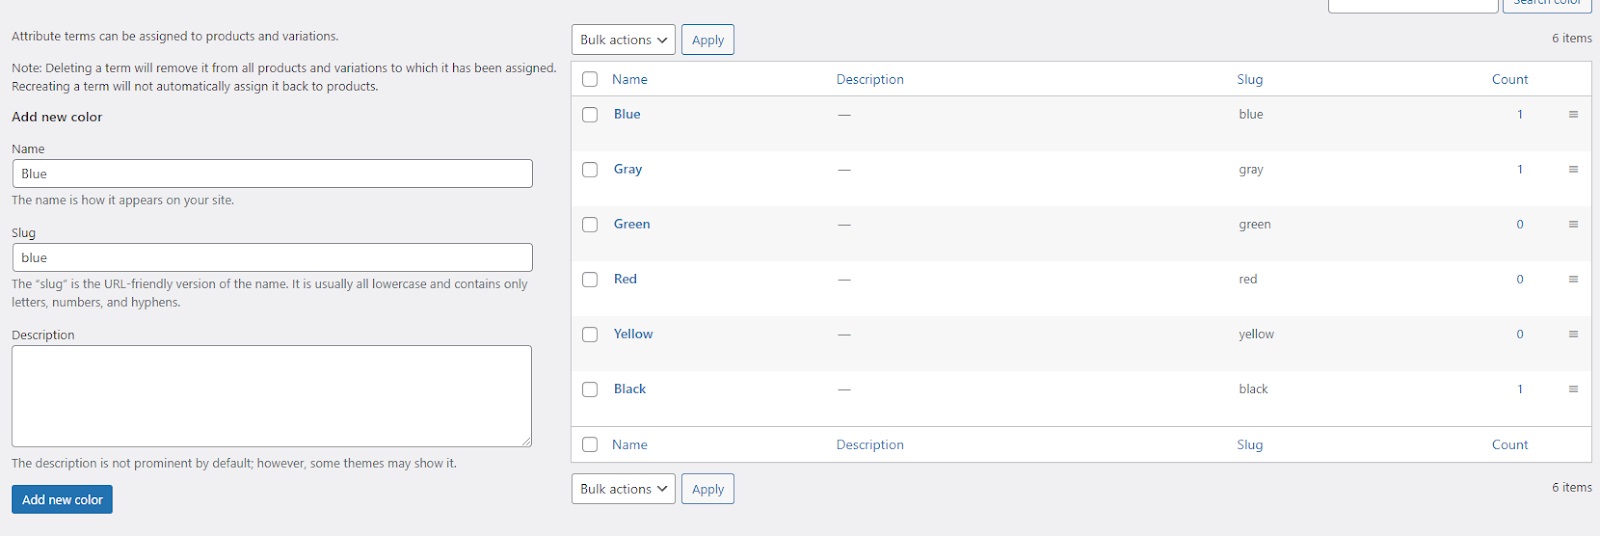
1. Add attributes – you can do that via Products → Attributes. In our example, we added a Color attribute.
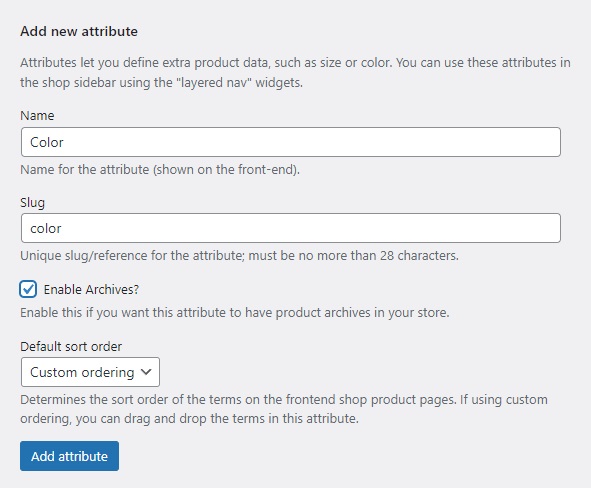
2. After you create the Attribute, you now must Configure terms (this will add actual Color variants to the list).
3. Assign attributes to a product – it’s time to move back to the product edit interface and navigate to the Attributes tab.
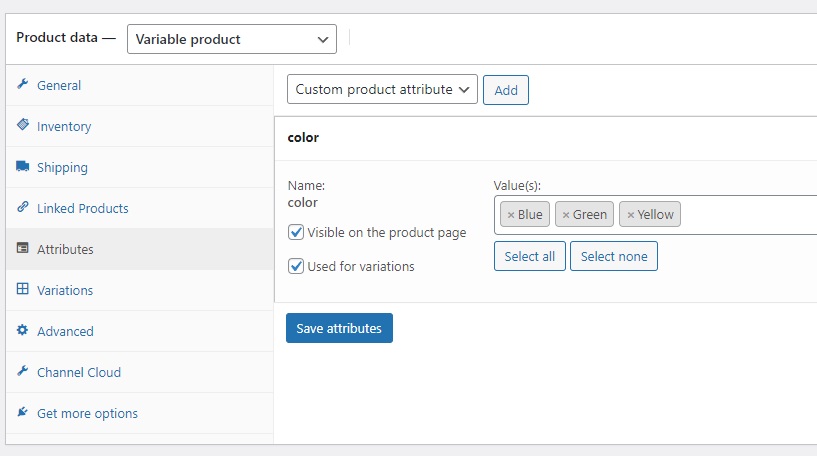
4. Add the desired Attribute to the product and make sure both Visible on the product page and Used for variations options are ticked. You also want to select all available attribute values for this product (in this example, our product is available in three colors: Blue, Green, and Yellow). Make sure to hit Save attributes after you finish adjusting the data.
5. Add variations to your product – the last step is to add variations via the product edit interface.
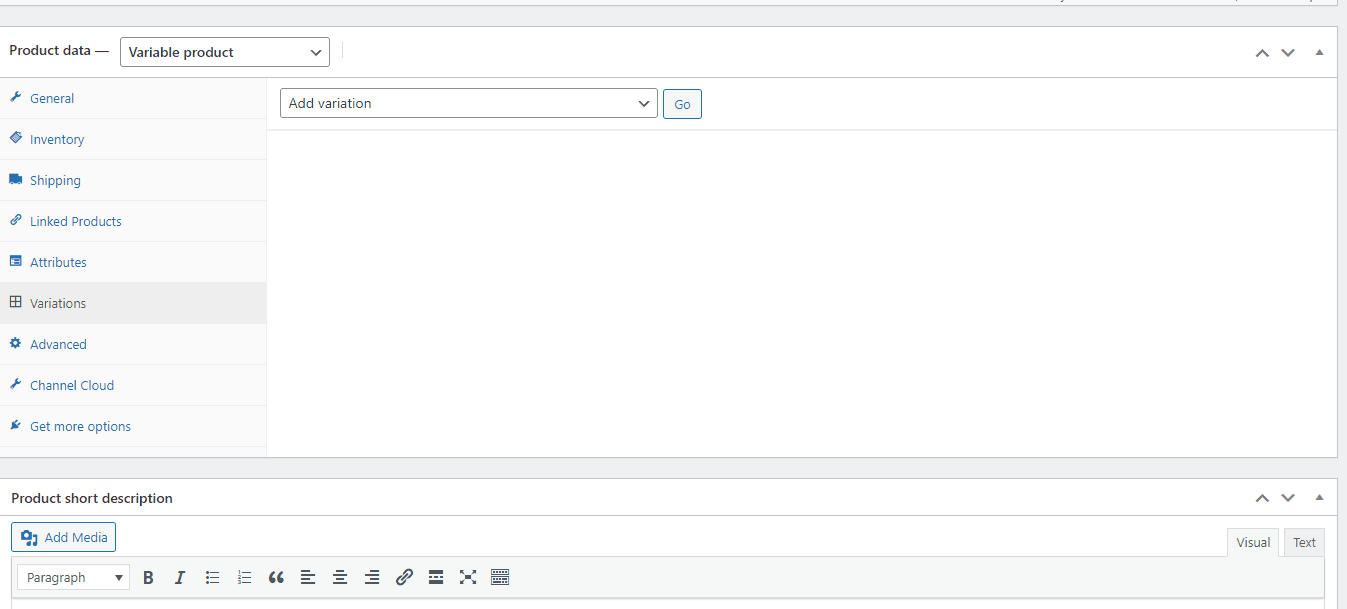
6. You want to repeat the same step for each of the variations. Once finished, buyers can select different variants from the drop-down menu in your WooCommerce store.