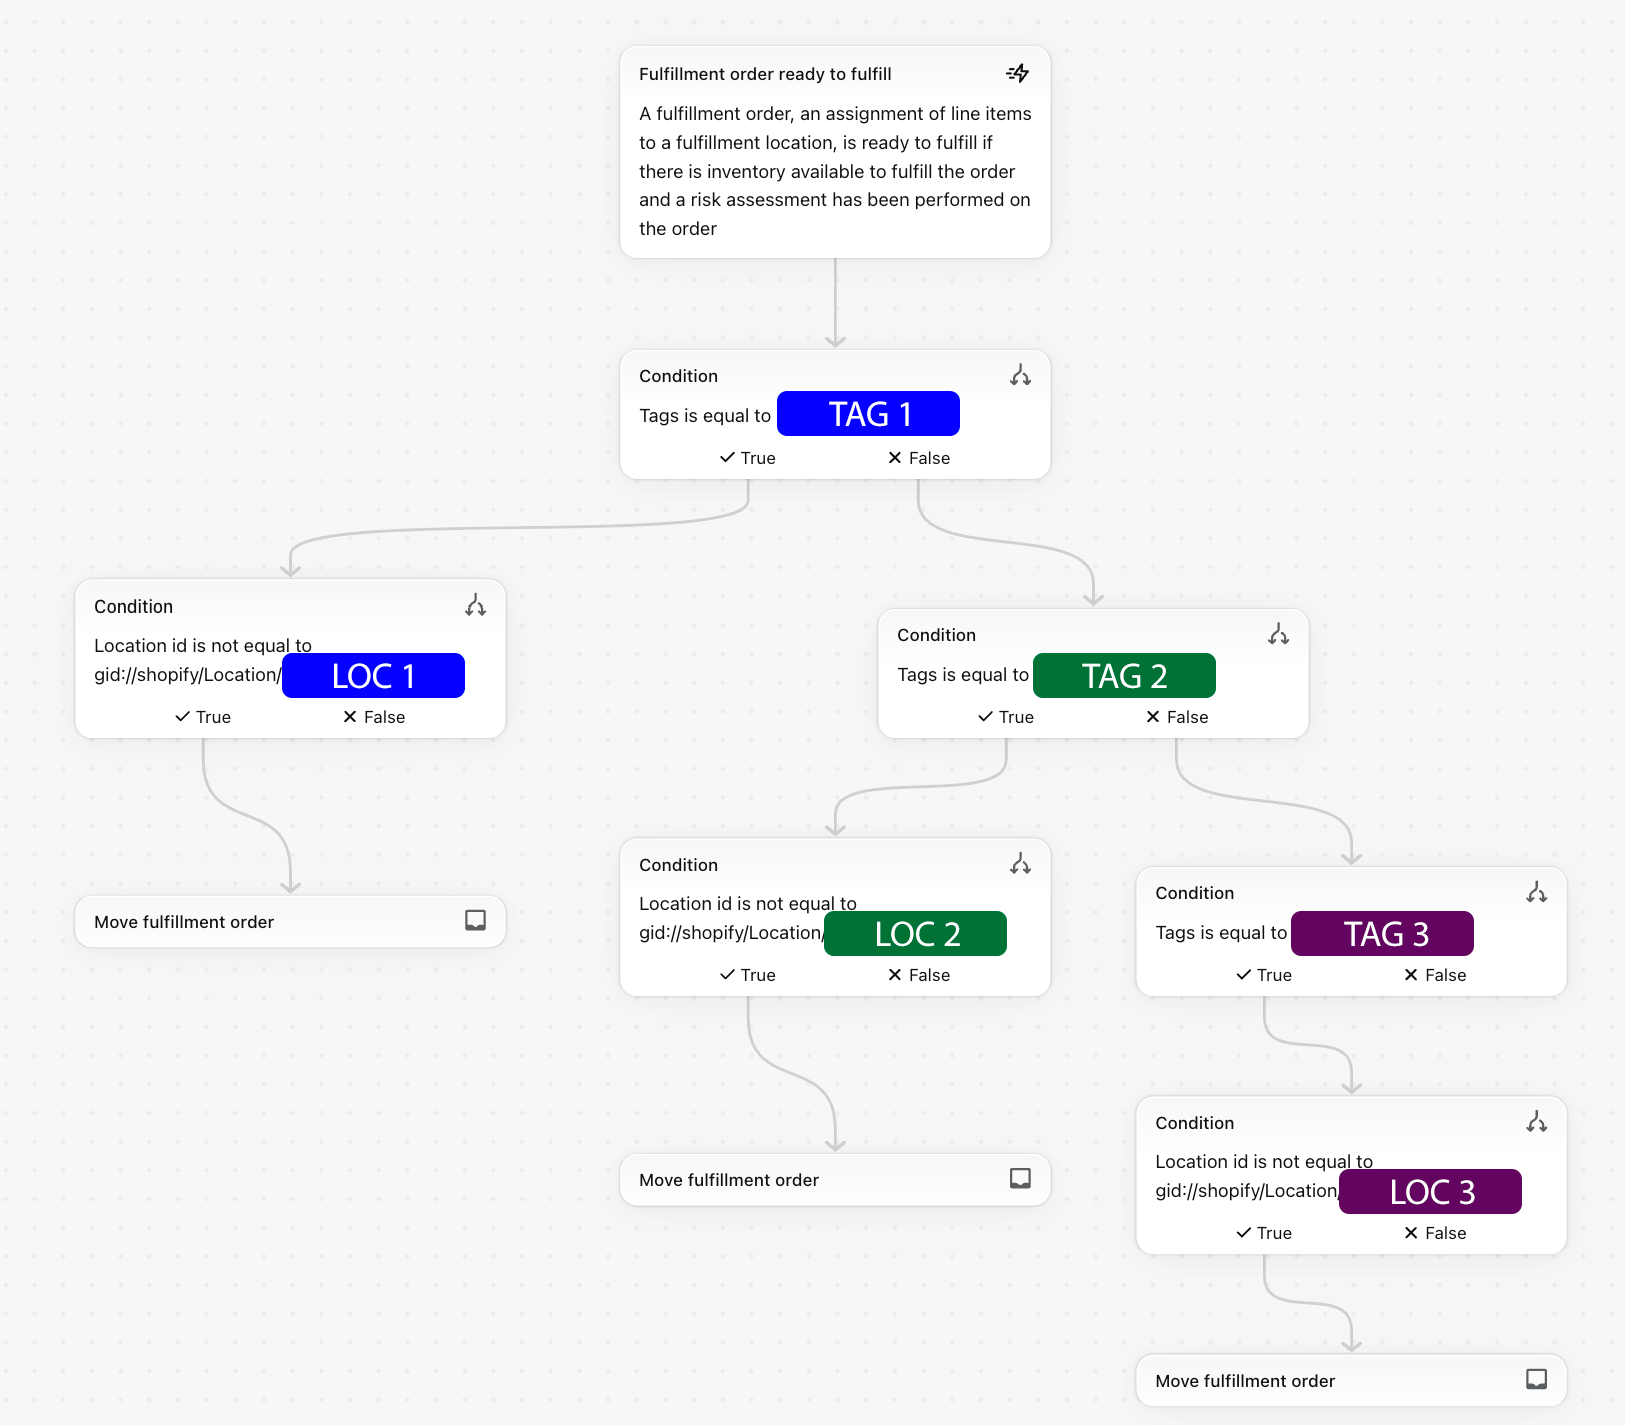
You can use Shopify Flow to automatically assign orders to different locations based on order tags provided by GeekSeller.
Step 1. Install Shopify Flow
Install the free Shopify Flow app from the Shopify App Store.
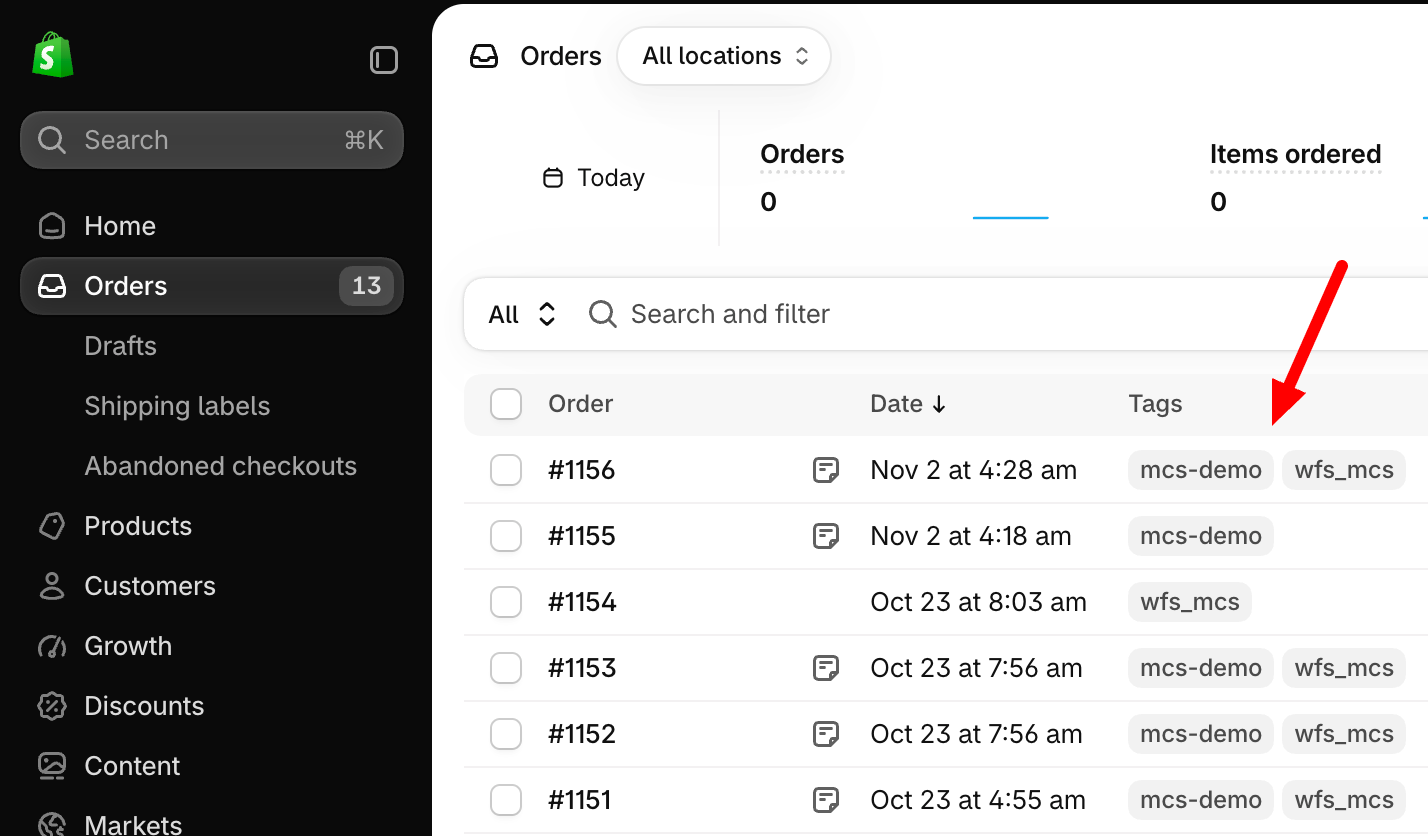
Step 2. Set Up Order Tags
GeekSeller can automatically add tags to your Shopify orders to identify their source or fulfillment method.
Contact GeekSeller support to configure the tags you need.
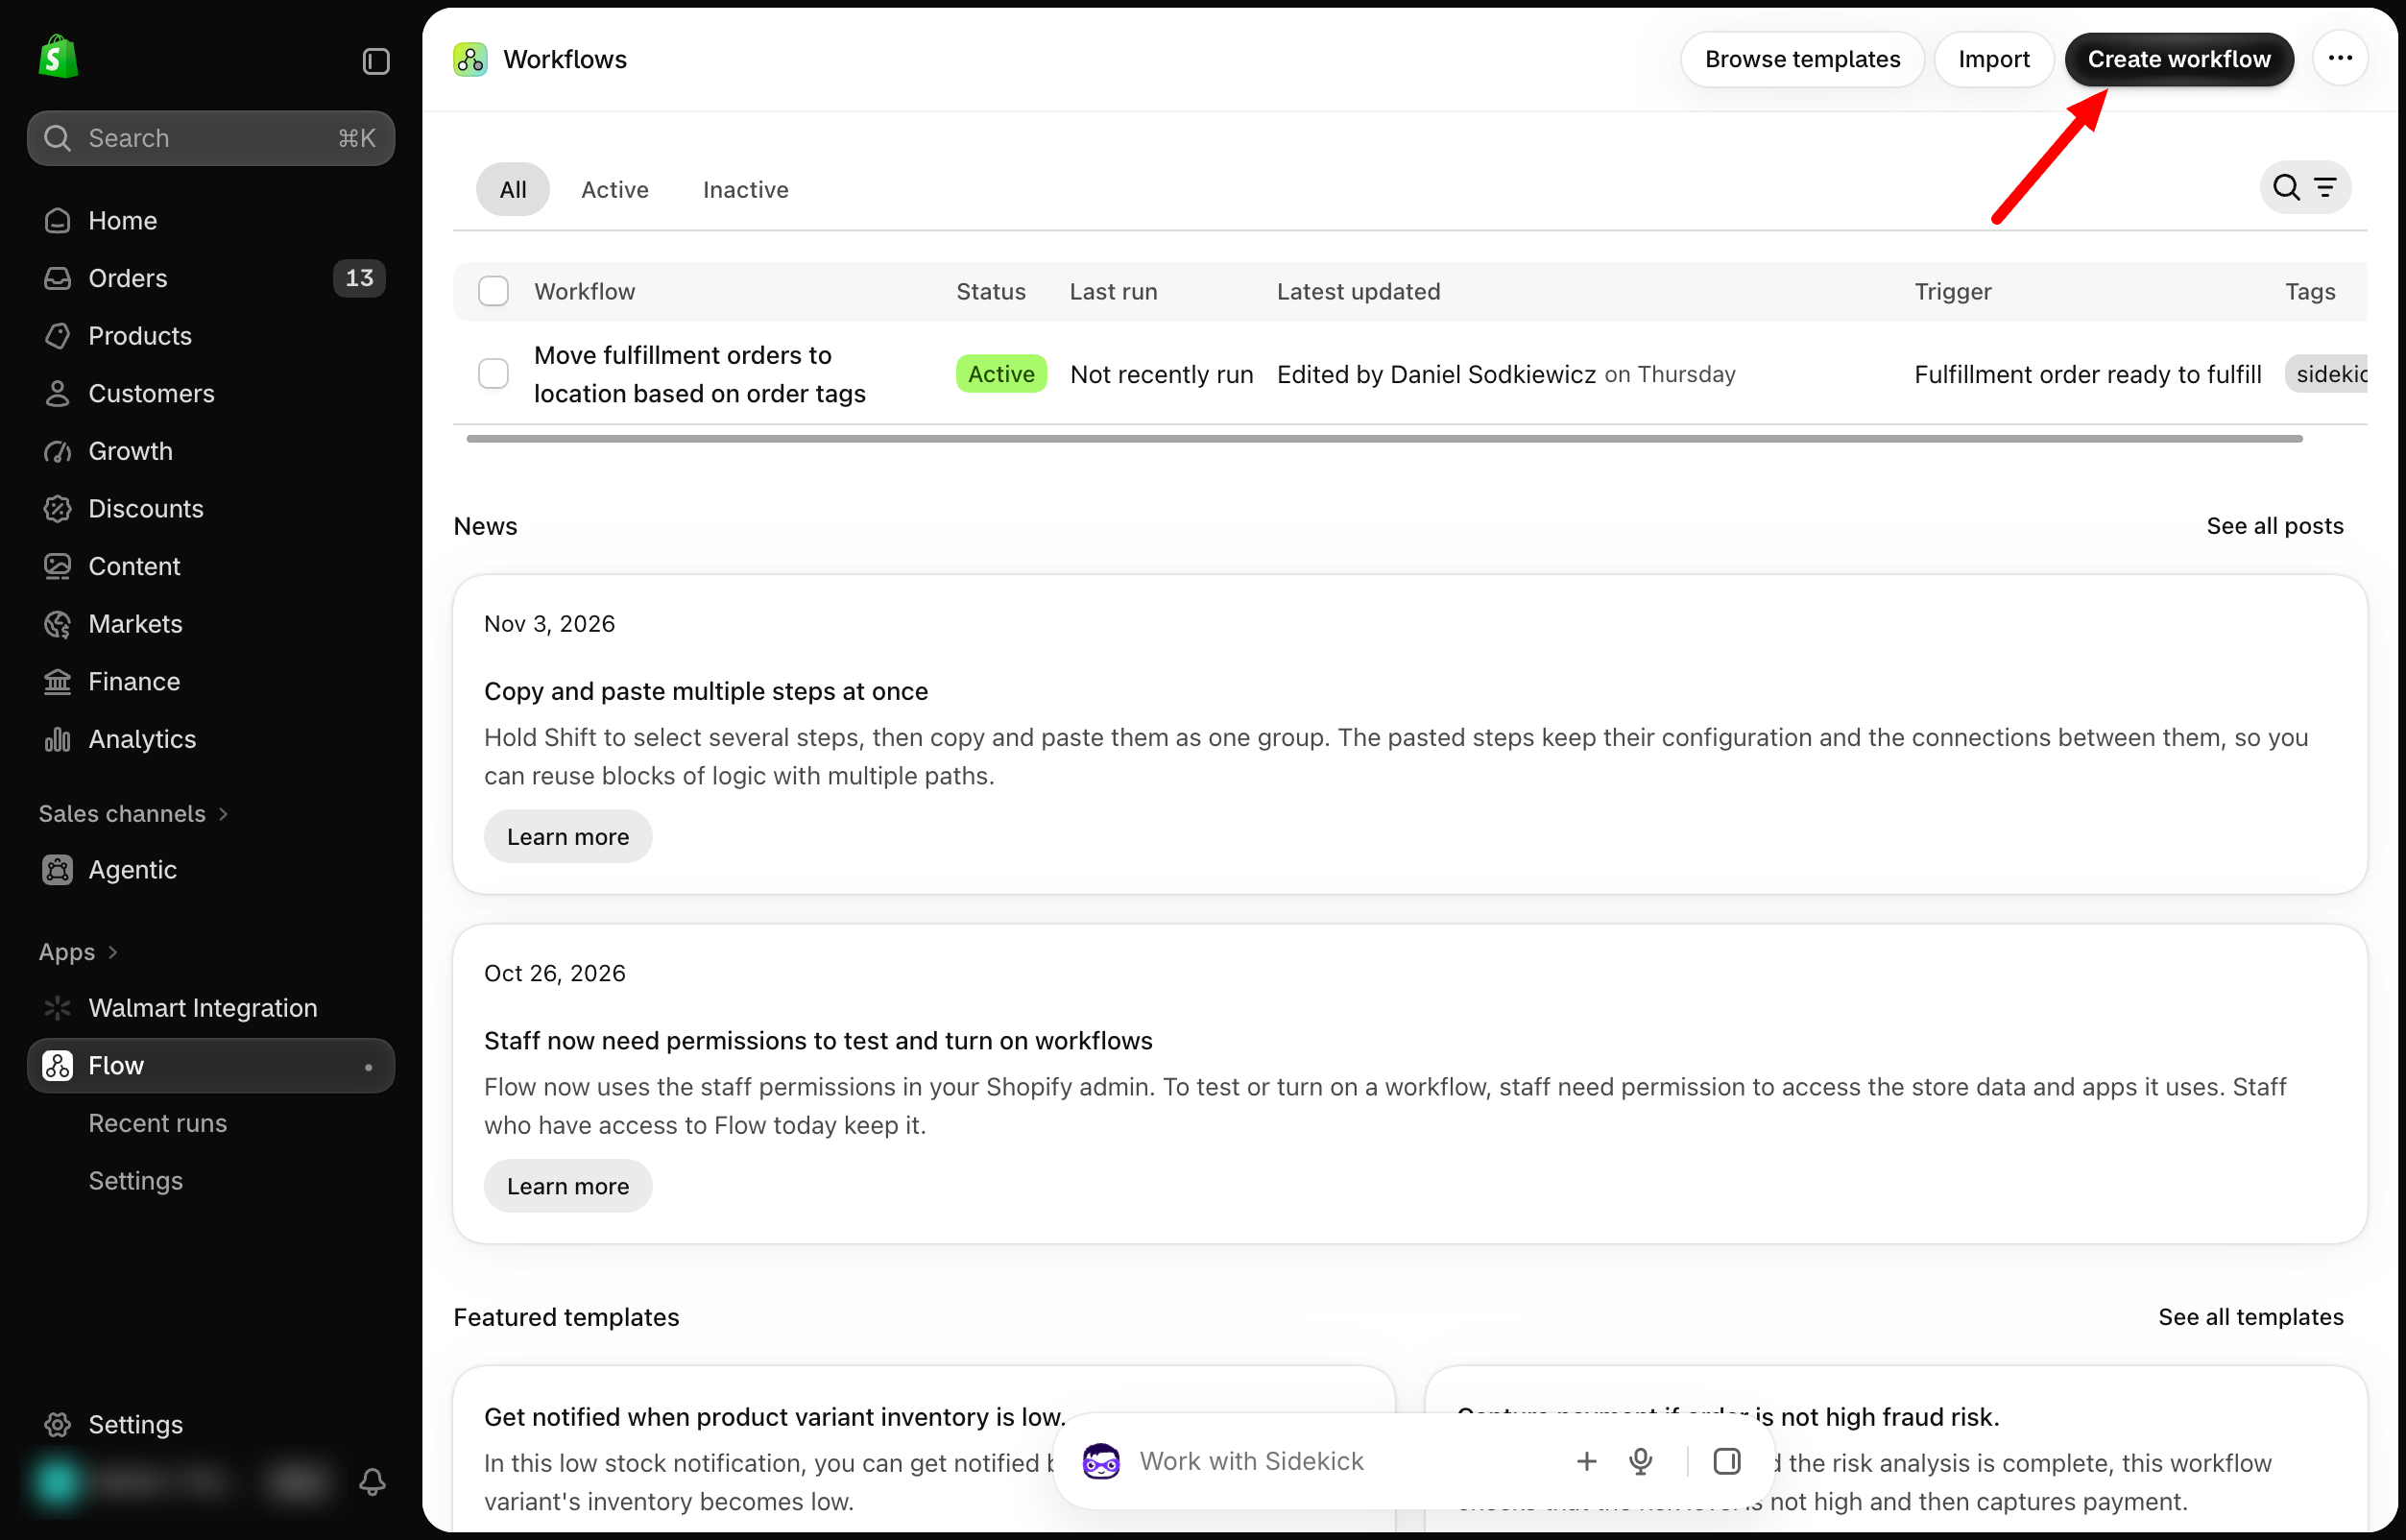
Step 3. Create a Workflow with Sidekick
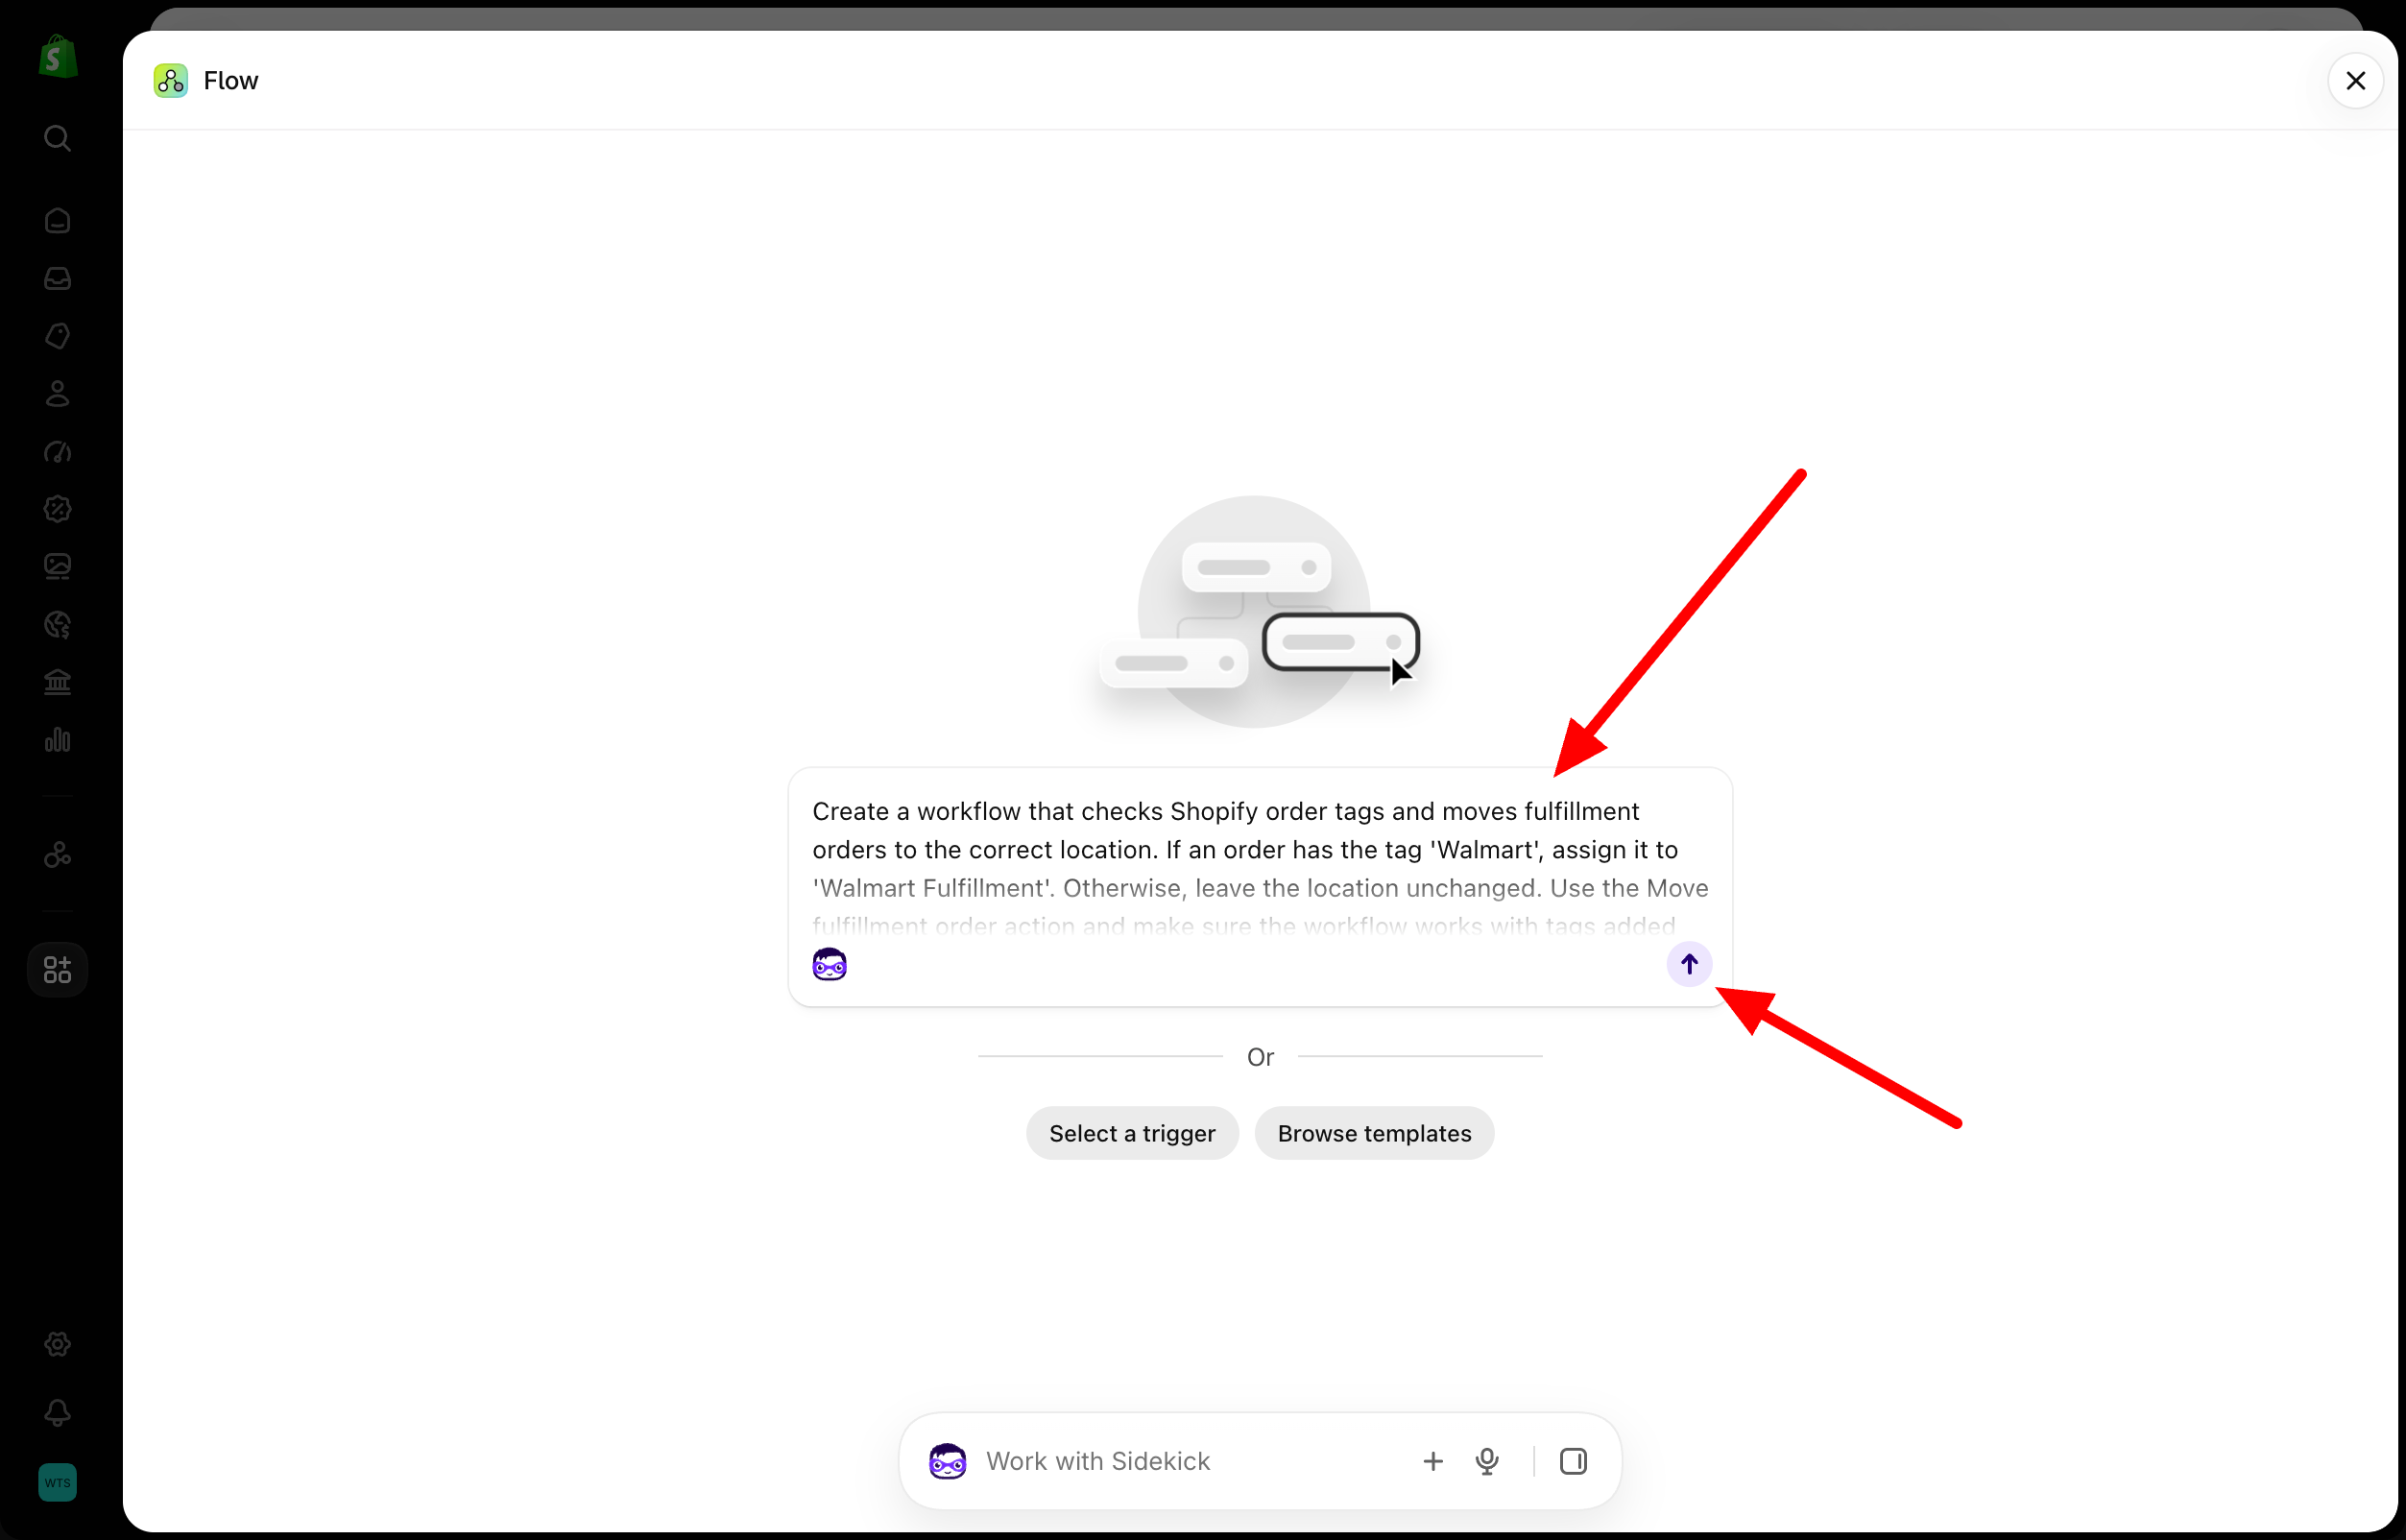
Open Shopify Flow and ask Shopify Sidekick to create the workflow using this prompt:
“Create a workflow that checks Shopify order tags and moves fulfillment orders to the correct location. If an order has the tag ‘Walmart’, assign it to ‘Walmart Fulfillment’. Otherwise, leave the location unchanged. Use the Move fulfillment order action and make sure the workflow works with tags added after order creation.”
Replace the example tag and location with your own.
Step 4. Review and Activate
Review the workflow Sidekick created and make sure the tags and locations match your settings.
Test it with an order to confirm the correct location is assigned, then activate the workflow.