To sell on Google Shopping via Google Shopping Actions, you need to set up the following:
- Google Merchant Center
Accessible from merchants.google.com, this is the merchant center allows you to upload product data to Google. The merchant center doesn’t list products without Shopping Actions. - Google Shopping Actions
This is a program that you need to apply for after setting up your Merchant Center. It enables you to make your products available via Google Voice Assistant, YouTube, and Google Shopping.
1. Set Up your Google Merchant Center and Google Shopping Actions
- Create a Google Merchant account to gain access to the Google Merchant Center.
- You apply for Google Shopping Actions from your Google Merchant Center:
 Please note that if your Merchant Center was not created in the US or France, the Shopping Actions option won’t appear. The merchant needs to create its Merchant Center in those two places and accept those terms of service to see the option.
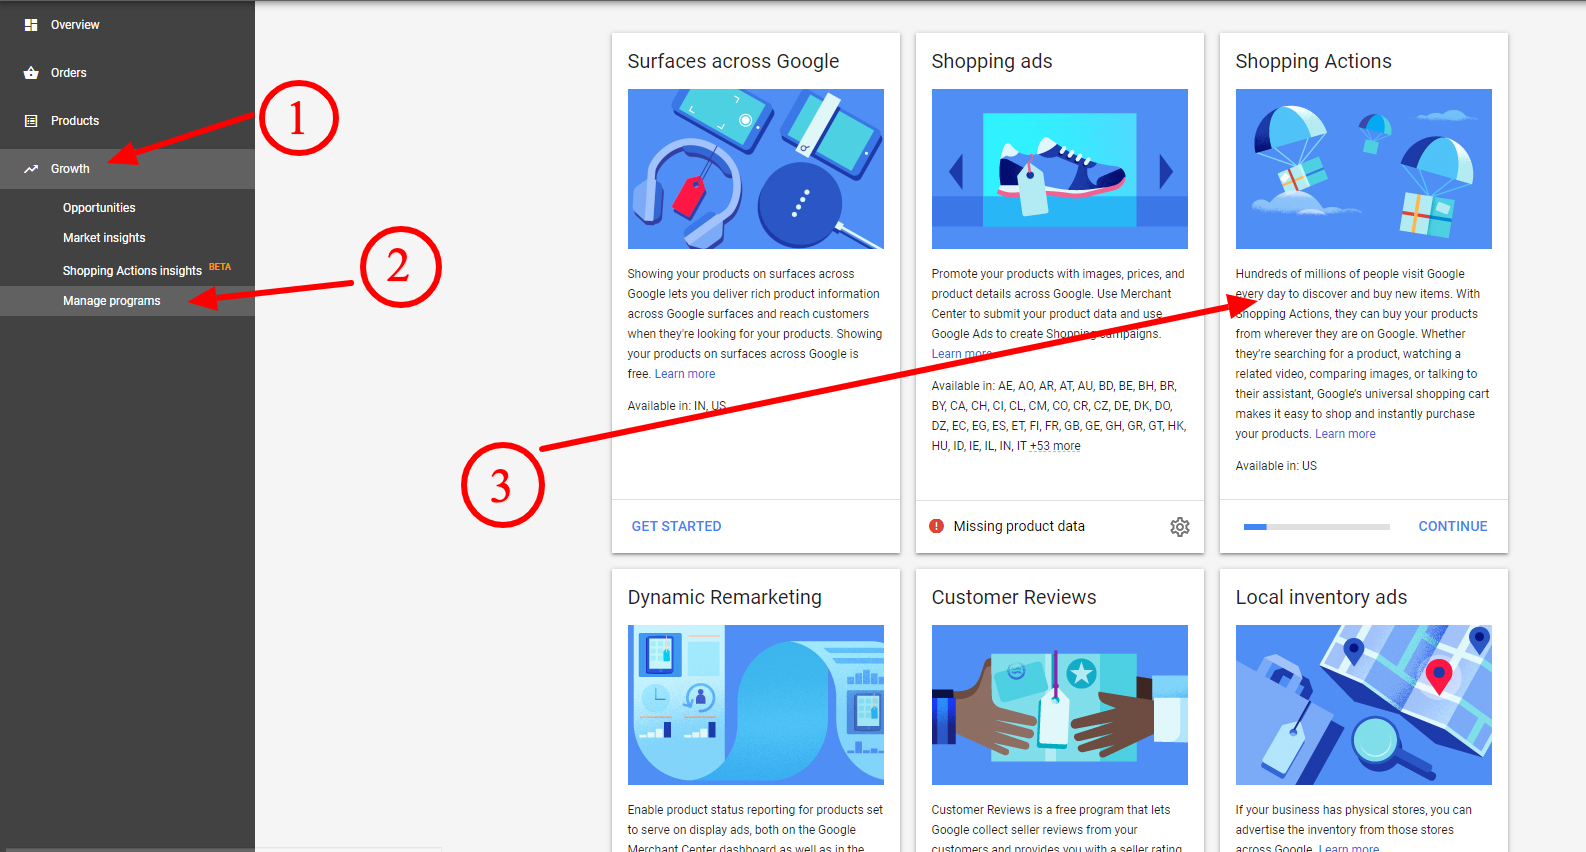
2. Set Up Shopping Actions
Log into your Merchant Center, select Shopping Actions from the left sidebar to complete the setup.
3. Connect GeekSeller to your Google account
- Go to GeekSeller Master Panel > Integrations, find Google, and follow the instructions.
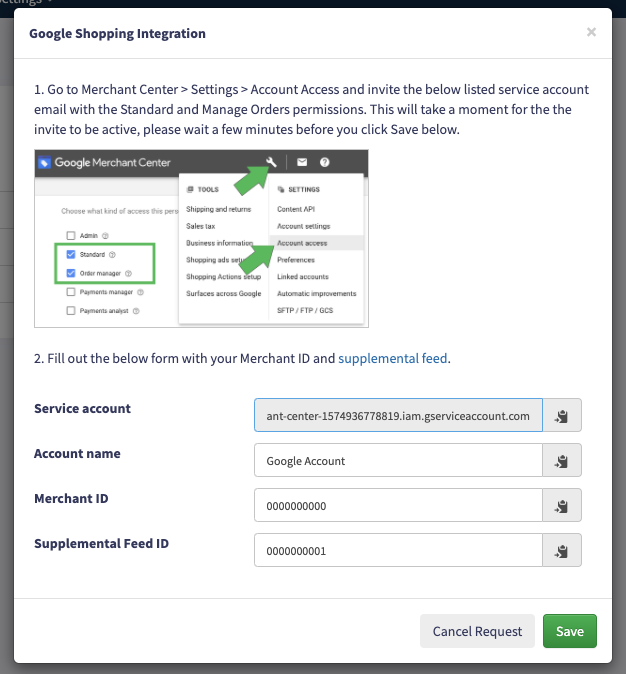
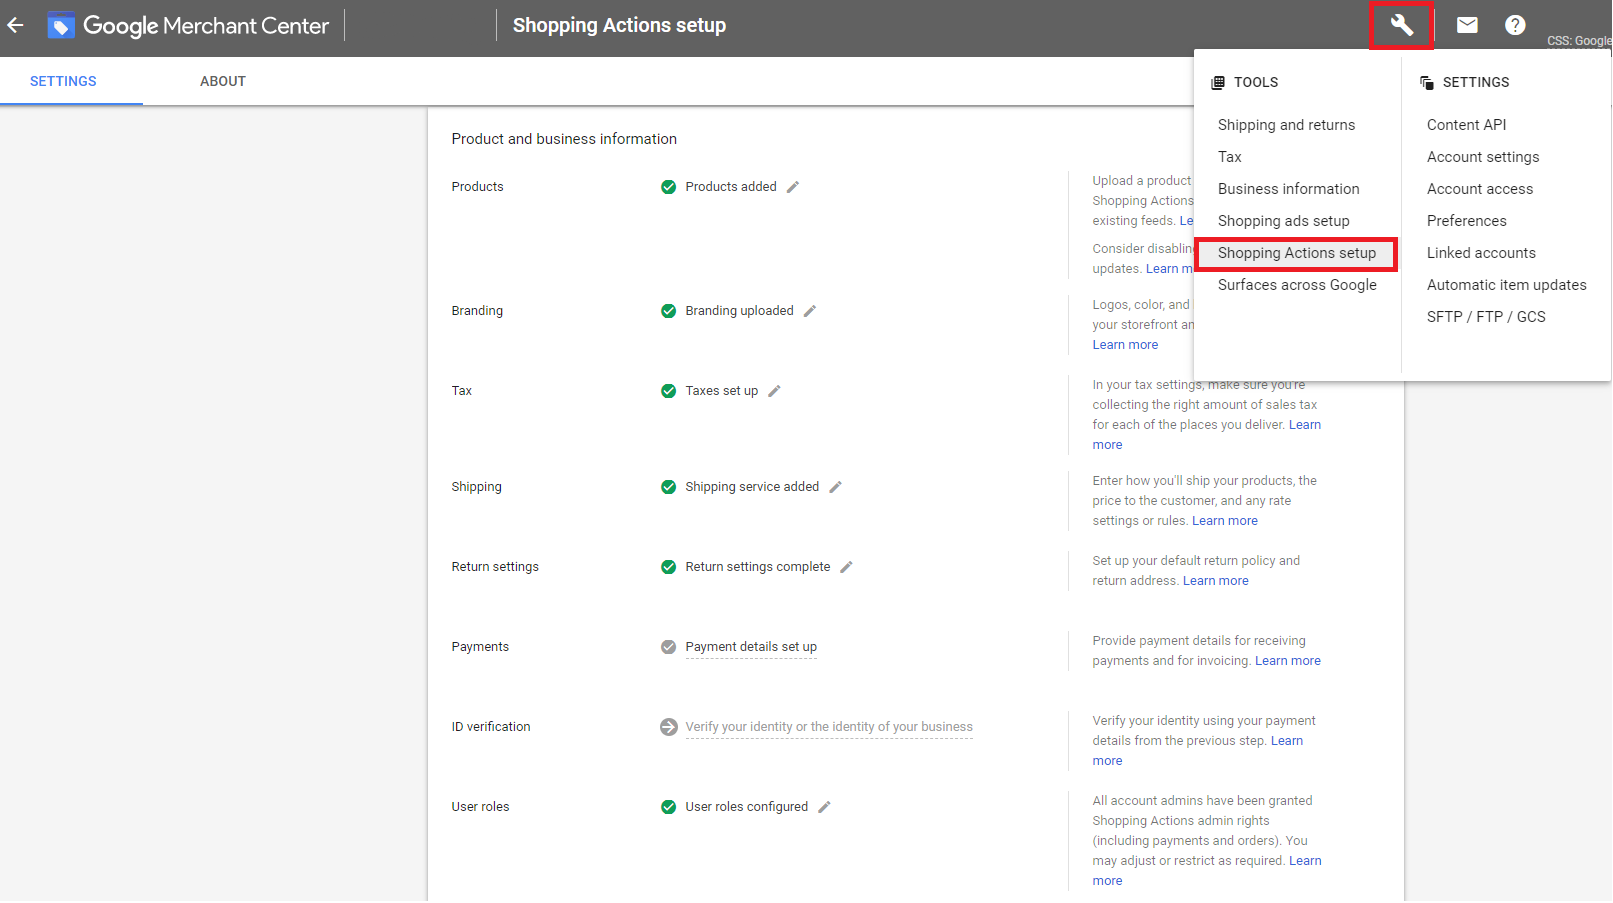
- You can find Merchant ID in your Merchant Center:

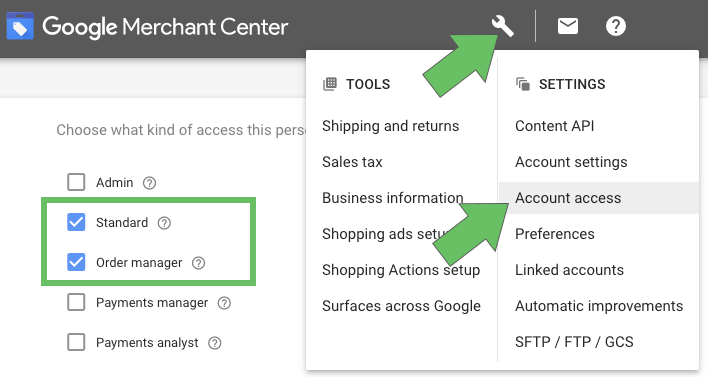
- The popup will contain an email address which you need to invite to your Merchant Center, make sure you select the correct permissions:
- You need to also create a supplemental feed and provide its ID.
- The Account Name is used just for you to easily identify an account.
4. Invite GeekSeller to your Google Merchant Center
This is an optional but very much recommended step, as it allows our team to troubleshoot any issues on your account easily.
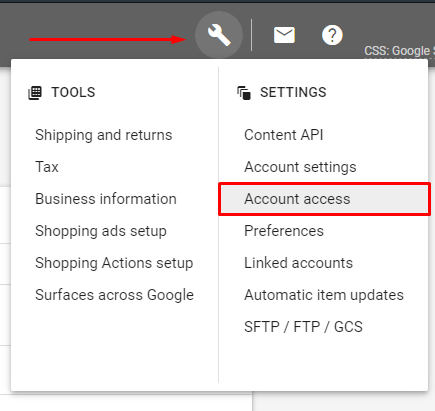
- Open the Merchant Center
- Click the settings button and select “Account access”
- Add a user under the email address: GeekSellerHelp2@gmail.com
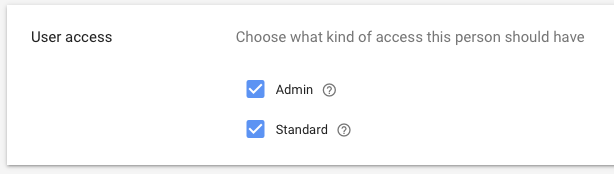
- Under User access, select “Admin” and “Standard” to allow us to help with account set up and product creation